Plastering. Oh what joy. One, incidentally, that I had not yet experienced. However, my sister, Blick, sweated out most of her plastering apprenticeship in this room.
This room is a monument to her perseverance and resultant skill. It was not an easy room to begin a plastering career in.
Normally the installation of cornice along the top of the wall means that the plasterer doesn't have to concern himself with the join between the ceiling and walls. It is all covered up. However, as we were creating and plastering our cornice ourselves, the plasterer of this room had three horizontal right-angle corners to deal with on top of the four vertical ones. Two concave and one convex. The final surfaces of that cornice consist almost entirely of applied plaster, I am sure. The original gyprock was but the skeleton awaiting flesh!
However painful, the creation of this different cornice effect was necessary and, indeed, attractive in the end. As can be seen, at this point the cornice has been created and half plastered on all four walls. The intrusion of the beam above the door is now invisible. Voila! Three identical replicas built, and the original problem has disappeared.
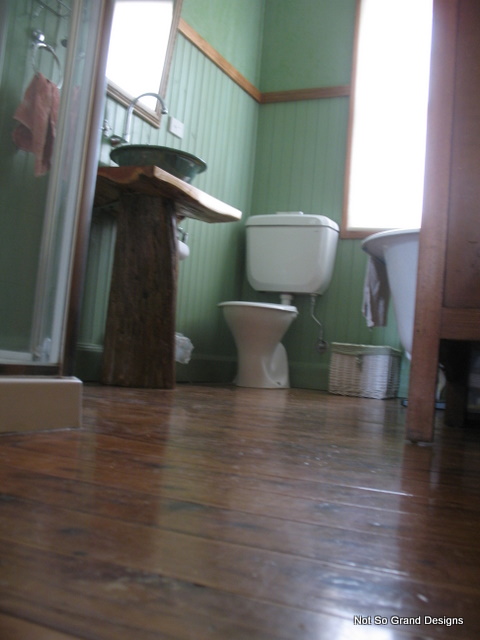
Here you can see that the shower base and tiled 'back' are installed. Two narrow glass panels and a glass door will complete it. The door is destined to angle across the front corner, saving room.
![Bathroom, looking toward door [2].](https://blogger.googleusercontent.com/img/b/R29vZ2xl/AVvXsEirh6ghgcJ3-d_au22lu3au96rAsgV6vhyphenhyphenifS-8jZkd7VVosxNZlU2pAGpRLPdwBq4mS5tyeMNy_HeRAsWZ7t1V0zlJQqu-6TpsDDOAAsvgY79rWyeoyuYm-Vl8zcfuv2Dt45SpBBKDLD4/s640/IMG_6568+Bathroom+toward+door.JPG)
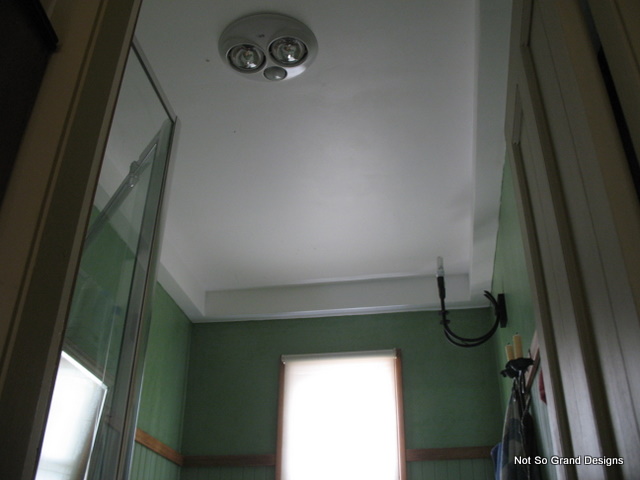
Yes, our shoddy old 'kitchen' lights are still our source of artificial light in the bathroom. Not long after, the electrician came and installed one of those three-in-one things, consisting of heat lamp, fan and normal light. He also installed a wall bracket light over the bath.

And this is the bath. A bath with a history.
One day Mum and Dad headed off to buy a free-standing cast iron bath. Of course, our almost non-existent budget was boasting it's customary several thousand less than several thousand dollars, so second-hand was our only option. Wandering amongst old baths galore, her keen eye on sharp lookout, our aesthetics director could find nothing suitable. That is, none except that ancient bath way down the back, full of ash and rubbish, rusted beyond belief and apparently leg-less.
Lets be blunt: it was a wreck. But, it had the Right Shape. Slick put to use the haggling skills he'd learned in Mexico so many years ago, and bought it. Are we crazy? Well, judge by the photo above.
Did you know that a glossy enamel paint is applied to trains? No? Neither did we, till we started researching places that might re-coat our bath in enamel. It's true, though, and that is what now covers our bath.
It wasn't quite as straight-forward as just rocking up to somewhere for a spray job, unfortunately. First the bath had to be laboriously scraped by the team as someone had hand-painted the bath - and it hadn't worked. At least it showed us how pointless
that avenue of endeavour would be. All that paint had to be taken off and even chisels were out before the end. Paint removed, we hauled it in to the enamelers and left it, waiting for the call that would let us know they'd found time for it. The call finally came and we picked it up (including the four odd legs - nothing like a bit of eccentricity!), lugged it home and polished it with the special cloths that were provided. This took off the last tiny nibs.
Finally we heaved into place, connected the plumbing and stood back to admire our new bath.
To be quite honest, our bath isn't the same as your average several-thousand-dollar new cast-iron bath. The enamel is thinner than the original enamel, as our enamel is a two-part paint product. This has meant, in practical terms, that it is much easier to chip or scrape the finish on our bath. Two years later and our bath now bears small scars from clumsily handled metal plugs and various other accidents, but it is certainly in full working order.


![Bathroom through door [left view].](https://blogger.googleusercontent.com/img/b/R29vZ2xl/AVvXsEjOGgsqwhNxTD60eP-q8VpzC_pSPbk0v-V00V5uvXcmFkR7zedA1VOXFdYJwDKilWOWcncZvKlS4zHvDqcN1JTJA-7qX1a3W4ECqWme1onpwrqYWNIr_a5RG1ibF__ERO2yhXzs1Yr4ii0/s640/IMG_6560+Bathroom+through+door+%5Bleft+view%5D.JPG)
![Bathroom through door [right view.]](https://blogger.googleusercontent.com/img/b/R29vZ2xl/AVvXsEgZUkBkQkEJxfBd0GaU3VMHgxzkpIJqEGVF_v_R1n3jR7HfGRNDDnmYQ-FqIIDf6S3QmJOvFqX2WTJ7605U03ZPxJ3NzTGZ-k1P91-rORYuWowThTYRiLkcru0MuK2JerhfI7lXRaFE_Tc/s640/IMG_6563+Bathroom+through+door+%5Bright+view%5D..JPG)

![Bathroom, looking toward door [2].](https://blogger.googleusercontent.com/img/b/R29vZ2xl/AVvXsEirh6ghgcJ3-d_au22lu3au96rAsgV6vhyphenhyphenifS-8jZkd7VVosxNZlU2pAGpRLPdwBq4mS5tyeMNy_HeRAsWZ7t1V0zlJQqu-6TpsDDOAAsvgY79rWyeoyuYm-Vl8zcfuv2Dt45SpBBKDLD4/s640/IMG_6568+Bathroom+toward+door.JPG)
