November 7th. Time to level the floor between old bathroom area, current lounge area and current kitchen. Time to create a room.
Llick takes her turn at the jarring end of the crow-bar, chipping horrible pink tiles off what used to be the outdoor veranda floor, preparatory to creating our own tiles.
Slick installs the frame for our new floor.
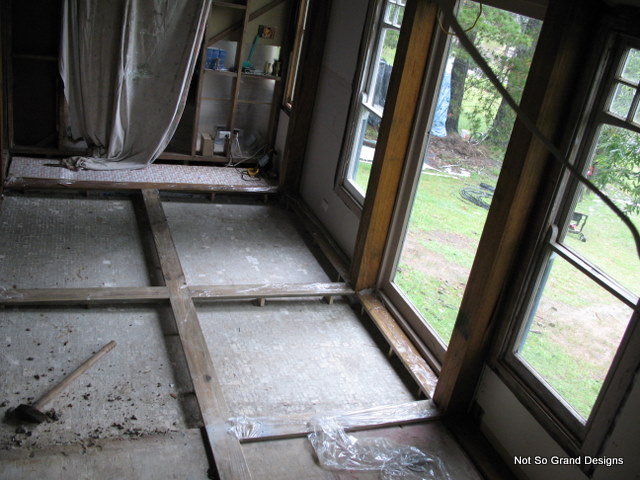
Framed up. Notice that the floor-frame ends between the green drill and the vacuum? We decided to move the wall behind the vacuum forward to the edge of the just-installed floor frame, making that section of floorspace (that the vacuum is on) part of the kitchen-to-be. Confused? Don't worry, it should all become clear eventually. Maybe...
Looking the other direction. We were wrapping the timbers in plastic to protect the pre-applied finish from the concrete and mess. It was annoying. Notice how the floor drops suddenly in the foreground and then slopes steadily away to the furthest corner? I guess, since the bigger section used to be a veranda, they wanted the drainage more than a level surface.
This photo shows the higher level, where the bathroom used to be. (The hole in the middle ground was the sink drain.)
New tiles, here we come. Yes, you are seeing a pile of gravel in the house, and no, we aren't kidding. We were about to create concrete tiles, divided by finished treated pine timbers, for our dining room floor.
This floor, if it worked, would accomplish several things: It would be a great for collecting heat in winter, being on the north face of the building and under big windows, or deliciously cool in summer, since it heats slowly; it would provide another visual cue to delineate the room; it would provide a reasonably sensible and hopefully hard wearing surface for a dining room; and it would be a floor that we could create ourselves without too much trouble or expense.
Mixing and spreading on the spot. Gravel, sand, cement, oxide for colour and water.
Fun stuff! Adult mud pies...
And a surprise ending, just to finish off, because guess what? We didn't take photos of the finished product! By next post (which should this time be much sooner than six months hence) I will hopefully have some pics of the finished floor.
Subscribe to:
Post Comments (Atom)


0 comments:
Post a Comment