RoofSpace Dilemma

Posted: Thursday, December 31, 2009
A few days after the happenings of the last post, Slick opened up the empty ceiling space over the dining room. The kitchen question had been decided, but the dining one remained. In other words, the whereabouts of the kitchen-to-be had been resolved, but whether to have a cathedral ceiling over our eating area had not.

The eventual destination of the kitchen was to be, technically, over the area previously occupied by the toilet room. This satisfied council requirements regarding preexisting plumbing, while also allowing us to use the 'pink bedroom', or north eastern corner room for our eventual kitchen. (May I just add that we are all SO glad that this is the way it worked out. The abundance of natural light in that kitchen is such a joy.) A wall, it was therefore decided, would be erected basically where the original wall had divided the toilet room from the shower/vanity room, partially cutting off the kitchen from the dining room area. The stove would stand on the concrete slab left over from the toilet room.

Part our deliberations regarding the dining room involved our wish to work with the principle that different ceiling heights help subtly divide spaces and indicate their uses. The theory was that if we had a higher ceiling above the dining room, it would delineate that area as different and separate from the lounge room. Another aspect we were juggling was energy in the forms of light and heat. If you remember reading an old post on the ideas and plans (read 'Exterior Philosophies') we had in the early days, you will recall that we played with the idea of lifting the roof height all along the ridge pole and putting in a second story. Like so:

A sketch of a possible barn-like house profile.
But by this time we knew we didn't have the time and money necessary to make this possible. We had not, however, ruled out putting windows in the gable to let extra light and heat through. We were already decided that the concrete floor of the dining/bathroom area was an ideal passive solar heat sink, so more windows seemed a good idea. However, several considerations had to be taken into account. The biggest was represented by the major beams running the nearly the width of the building. Structurally, a cathedral ceiling was impractical. We also worked out that not much usable light could be collected through the gable.

Slick preparing to climb a ladder.
(Above and below): Slick opening up the ceiling over the dining room.
 Slick working up the ladder.
 
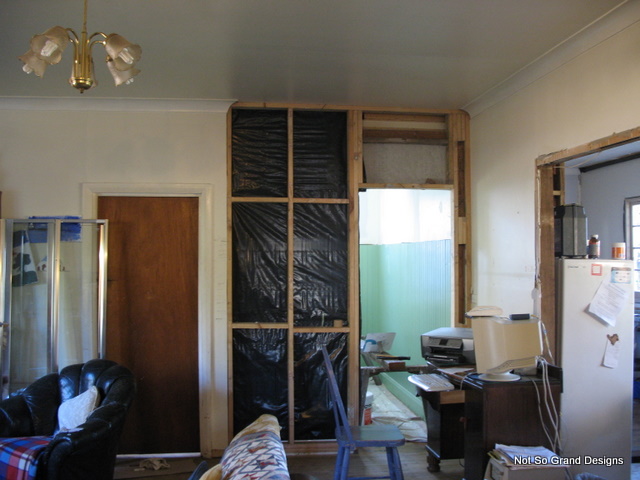
As can be seen above, the only remaining ceiling area is above where the toilet room was.

 
Home education within a home renovation.
 
The show must go on.
 
And then someone brought up the idea of an attic area, again. Why not go the opposite direction from a cathedral ceiling and instead drop the ceiling height over the dining room, granting just enough height for a legal (and maybe even usable) room above? This was a prospect most beautiful and dazzling to our entire romantic, space-starved family. In fact, the idea captured our hearts, but also made its discussion the more stressful. Some considered the idea just romantic, wishful, impractical thinking; most thought it wonderful and didn't really care about practical details as they essentially weren't their problem; others thought it a great idea and overflowed with creative ways to make it work (some of which were cause for some anxiety). The main problem with the attic idea was the necessity of access - ie, a staircase - and the distinct lack of floorspace. A spiral staircase was the most popular suggestion, but then where on earth would we put it? Put it underneath the attic and there would hardly be any floorspace upstairs; put it out in the lounge and it would majorly interrupt traffic flow and visual continuity. As principles, practicalities and personal wishes mixed within the key players, stresses mounted with each discussion. But gradually we worked it through and some decisions came to be made.

Firstly, we decided to scrap the cathedral ceiling idea and instead lower the ceiling to about the height of the top of (what was then) the current doorway beam. (See photo above.)

Secondly, we decided to frame the extended dining room (which would include all the previous bathroom area except the toilet room) with post and beams, helping to delineate that area as separate from the lounge and kitchen. This post and beam theme would also be used in framing doorways between the lounge room and other areas.

Thirdly, we decided to level off the floor surface of the dining/old bathroom area, transforming it into one room.

Fourthly and finally we decided to build in an attic above the dining room, accessed by a winding staircase to be installed at the end of the dining room, a space at that time occupied by the kitchen doorway. The kitchen/bedroom-to-be would subsequently be accessed through a door set in under the stairs (the family rejoices once more - are we not sad creatures?).

So there you go. Now you know how some of our most momentous decisions were made and a little bit about why they were made. Hopefully it makes some sense. Make sure you comment if it doesn't because I have many more posts ahead, and thus many more opportunities to explain things.

Erasing Bathroom Tracings

Posted:
Well, we may not yet have decided one way or another where the kitchen was or wasn't to be, but fiberglass fibers from old ceiling insulation still needed to be blocked off from the air we breathed, walls still needed to be plasterboarded and the ceiling support issue had to be resolved. The renovation went on.

Wedging the ceiling supports in.
The most important job was keeping the ceiling propped up. I'm sure you can imagine why. The second most important thing was sealing off the ceiling - with spare sisalation in the bathroom area and black plastic in the dining room. The black plastic had already been up but was now replaced temporarily. The usual unhealthy effects attributed to breathing fiberglass fibers and dust would have been worse in a family containing at least three asthmatics.

Looking through the dining room from the kitchen.
The view from the kitchen toward where the bathroom had been can be seen above. The books and various paraphanalia that the dinner table is bearing up under was all mostly cleared off the as-yet-unmoved crockery cabinet that can be espied in the distance.

Cutting gyprock in the dining room, preparatory to cladding the wall.
In this photo (above), we have begun cutting the second-hand gyprock to fit the wall we are facing. As neither Dad nor I enjoy this job, I'm afraid we weren't very cheerful. 

 Fitting in piece of gyprock.
However, we got through it. And it looks good when done. At least, it does after living with black plastic for months, I assure you.

It is surprising how easily one becomes used to the look and doesn't notice it after a while. Until, that is, one entertains visitors and notices with re-sensitized eyes the eyesore it really is. Not that we left our walls unplastered and unpainted out of laziness or choice, but lack of resources and time did mean that we lived with this state of affairs for some time.

Bathroom Demolition - Days 2-3

Posted: Wednesday, December 30, 2009
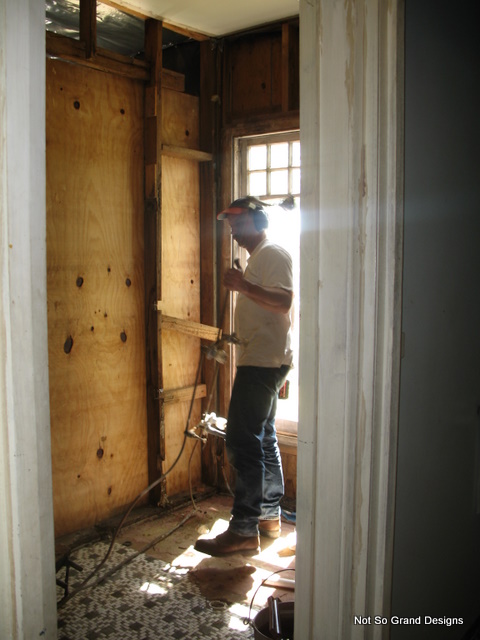
Next morning (after the events documented in the previous post), Slick removed the plumbing and began to take down the wall. Porch/dining area and bathroom were about to become one.

Slick pulling the plumbing off the walls.
Isn't the morning sunlight flooding through that window glorious? It was especially so to us, having used that room almost entirely by artificial light for most of the past eighteen months. Below, at the beginning of Day 3, Alick can be seen sweeping the floor after Slick had taken down the plywood wall. In the photo on the right, if you look through the wall frame, through the dining room and past the fridge, you can see Llick in the kitchen. Since we closed off the original entry into the kitchen by putting in the new bathroom, we had to make that opening through to the kitchen. It was much more convenient for transferring food onto the table, however.

Alick running out of the bathroom with a broom in her hands.Alick sweeping the bathroom floor.


 Slick removing cornice previous to removing a large piece of gyprock.
  The large top piece of gyprock, from the wall between the bathroom and lounge room, being lowered to the floor.In the above photo, the last piece of gyprock is coming down, opening up what was the bathroom to the lounge area. As you can see on the left, nobody has yet worked up the energy to empty and move the crockery cabinet.

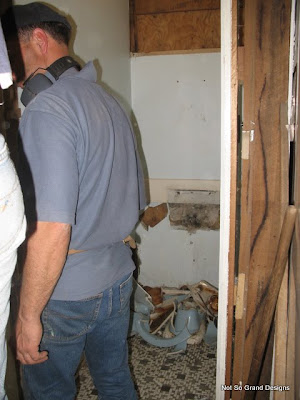
The pile of pale blue pottery shards that used to be a toilet. Slick removing the gyprock from between the toilet room and the main bathroom.


You will see in the above photos that Slick is opening up the toilet room, too. The toilet,as seen on the right, is no more. Its stained ugliness dictated a swift and effective end. Somebody had fun.

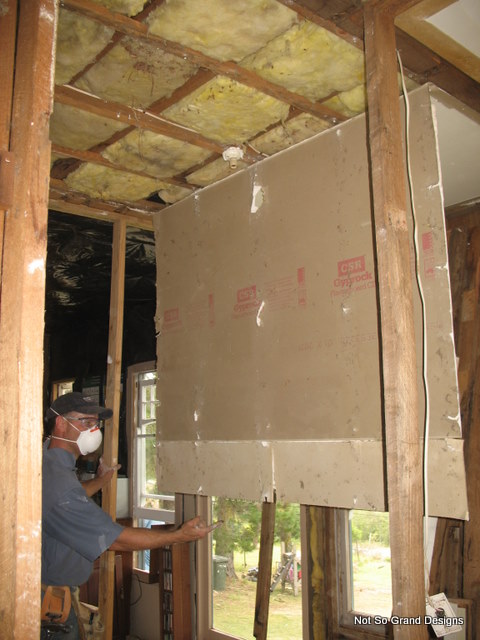
 Slick stands with one finger out to catch a large piece of ceiling gyprock that is hanging only by its taping join.
 Ah, never say we don't have fun - every now and again. This piece is obviously part of the ceiling, which was destined - one way or another - to change. At this stage we were still undecided whether to create a cathedral ceiling over the dining room, or somehow fit in a little attic. If fact, we were also playing with the idea of putting the new kitchen in this bathroom/toilet area - a new idea for us. Up to this point, we had been planning on putting the new kitchen in the big room on the south east corner of the house; however, council regulations had made things complicated. We had by this stage discovered that, unless we spent the large, precious quantities of money and time necessary to lodge a development application, we could only put bathrooms and kitchens in areas that contained existing plumbing. We got away with moving our bathroom because it was put in the kitchen; we now knew we would be able to legally move our kitchen, as long as we put it where the bathroom had been. The question now was, How can we fit within the council regulations and at the same time make this work for us within the plan of the house? How can we put the kitchen where the bathroom was, yet make it an efficient and usable space?

 Slick moving the just-removed gyprock out of the room.
As you can see, the space was not large. Not for a kitchen for a family of nine. If you also look back up at the photo taken from the lounge room and imagine the pink room beyond as another living room, it will become obvious that putting the kitchen in where the bathroom had been would also create a bottleneck between one half of the public living space and the next. All these things and more we pondered in between our progressive deconstruction of the old bathroom. To discover our eventual resolution of these issues, you'll have to wait on coming posts!

Bathroom Demolition - Day 1

Posted: Tuesday, December 29, 2009
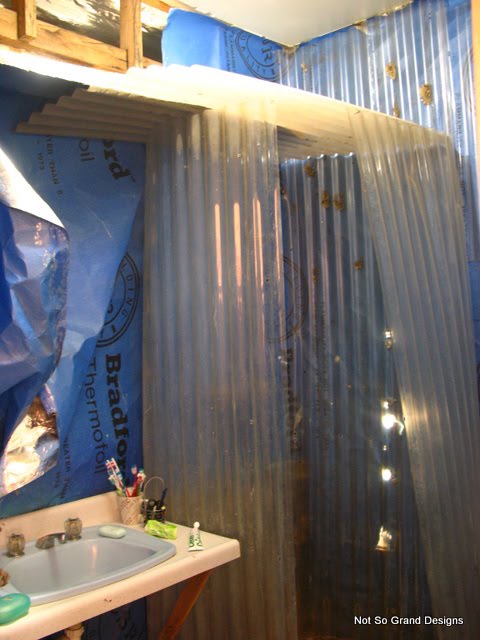
Soon after completing the new bathroom, we eagerly set to work on the demolition of our unusual old bathroom. This is the 'before' shot in all its glory:

 The corrugated plastic shower, vanity-less sink and blue sisalation walls.

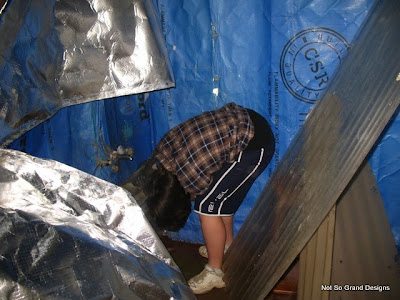
Followed by a few 'during' shots: (Below: Unscrewing the corrugated plastic.)

Unscrewing the shower sections.

 (Below: Observers.)

 Mlick and Blick observing progress through the doorway.

(Below: The window finally uncovered. We showered every day in front of that window!)

 The sisalation drawn back to reveal the window behind the shower area.
(Below: Day's end.)
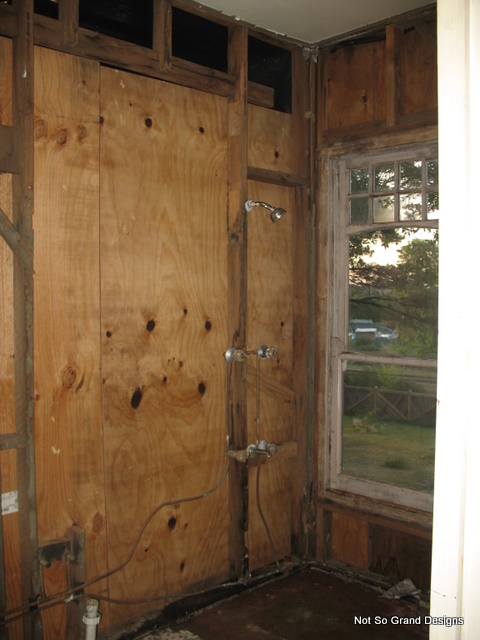
 Flash-lit exposure of the shower corner, minus everything except plumbing.

The plywood had been put up temporarily to replace the asbestos that we took off right at the beginning - eighteen months earlier. It would soon come back down.

It was a joy to rip all this stuff out, I can heartily assure you. (Especially as I was the one who got to do most of the ripping, at this stage.) After agonizingly slow progress, negotiating endless obstacles, we had finally reached a stretch of open road and were determined to make the most of it while it lasted. Destruction is so much easier than construction. I'm sure that one is justified in adapting 'All work and no play makes Jack a dull boy' to 'All construction and no destruction makes Jack a burned out boy'! Normally I would object to such a saying, but in the renovation business deconstruction is part of going forward, and normally these stages are the fastest and, therefore, most stress-free. 'Forward' looks a lot like 'backward' sometimes!

Room for a Bath

Posted: Saturday, November 28, 2009
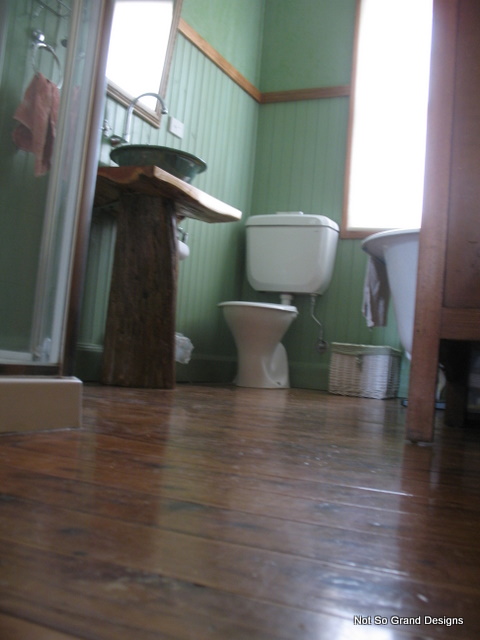
 Here are some photos (finally) of the finished bathroom:

 Towels hanging along the wall from hooks on the picture rail.

Looking through the doorway into the bathroom.
 The above photo is taken from the doorway into the bathroom.
  
   Looking through the doorway from floor level.
 From the doorway, only this time down close and personal with the floor.
  The ceiling light, wall light bracket, candles on little cupboard and window, from doorway.
 A view of the various light sources. The candles are more for decoration than anything, though they come in useful in black-outs, which are not an uncommon occurrence here.

 Facing back towards the door from over bath.
This photo was taken while standing on the edges of the bath, facing back towards the door. (Obviously!)

 The sink, using the flash.
The sink, using the flash. Did I mention before that the washbowl has a special glaze?

 Facing the shower and sink, from over the bath.
Standing on the bath still ...

 Looking over the sink, past the shower, towards the door from the toilet corner.

So, this is our bathroom. Since I just took these photos today, I can say 'this IS our bathroom'. And it WAS our bathroom too. Over the past two years since its completion, not much has changed.

The completion of this room represented the conquering of a stage in the renovation. It was the first room to be completed and it was the room that had to be done before anything else. Completing this room meant the beginning of the rest of the renovation.

So you can imagine the relief and excitement we felt due to these reasons, but cast back to my post on our old bathroom and you will understand a little of the wonder and appreciation we also felt for this fresh, clean, light-filled 'water closet'.

Next post will reveal the Demolition of the Blue Bathroom...

Bathroom Makes Progress

Posted: Tuesday, November 17, 2009
 Bathroom through door [left view].
Plastering. Oh what joy. One, incidentally, that I had not yet experienced. However, my sister, Blick, sweated out most of her plastering apprenticeship in this room.

 Bathroom through door [right view.]
This room is a monument to her perseverance and resultant skill. It was not an easy room to begin a plastering career in.

Normally the installation of cornice along the top of the wall means that the plasterer doesn't have to concern himself with the join between the ceiling and walls. It is all covered up. However, as we were creating and plastering our cornice ourselves, the plasterer of this room had three horizontal right-angle corners to deal with on top of the four vertical ones. Two concave and one convex. The final surfaces of that cornice consist almost entirely of applied plaster, I am sure. The original gyprock was but the skeleton awaiting flesh!

However painful, the creation of this different cornice effect was necessary and, indeed, attractive in the end. As can be seen, at this point the cornice has been created and half plastered on all four walls. The intrusion of the beam above the door is now invisible. Voila! Three identical replicas built, and the original problem has disappeared.

   Bathroom, looking toward door.
Here you can see that the shower base and tiled 'back' are installed. Two narrow glass panels and a glass door will complete it. The door is destined to angle across the front corner, saving room.
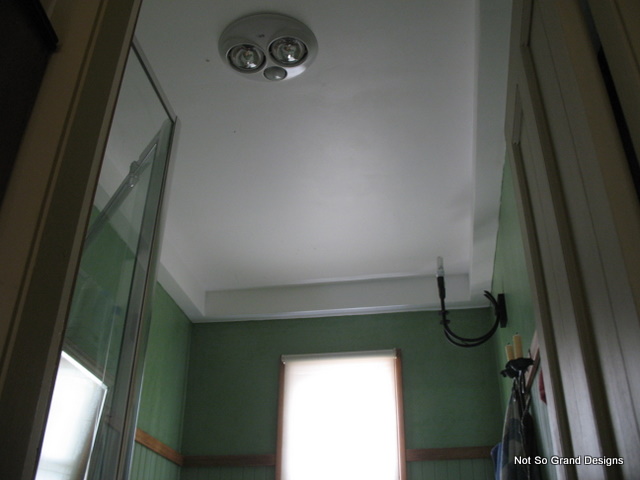
  Bathroom, looking toward door [2].Yes, our shoddy old 'kitchen' lights are still our source of artificial light in the bathroom. Not long after, the electrician came and installed one of those three-in-one things, consisting of heat lamp, fan and normal light. He also installed a wall bracket light over the bath.
 
 Blick, Klick, Alick and Glick polishing the bath.
And this is the bath. A bath with a history.

One day Mum and Dad headed off to buy a free-standing cast iron bath. Of course, our almost non-existent budget was boasting it's customary several thousand less than several thousand dollars, so second-hand was our only option. Wandering amongst old baths galore, her keen eye on sharp lookout, our aesthetics director could find nothing suitable. That is, none except that ancient bath way down the back, full of ash and rubbish, rusted beyond belief and apparently leg-less.

Lets be blunt: it was a wreck. But, it had the Right Shape. Slick put to use the haggling skills he'd learned in Mexico so many years ago, and bought it. Are we crazy? Well, judge by the photo above.

Did you know that a glossy enamel paint is applied to trains? No? Neither did we, till we started researching places that might re-coat our bath in enamel. It's true, though, and that is what now covers our bath.

It wasn't quite as straight-forward as just rocking up to somewhere for a spray job, unfortunately. First the bath had to be laboriously scraped by the team as someone had hand-painted the bath - and it hadn't worked. At least it showed us how pointless that avenue of endeavour would be. All that paint had to be taken off and even chisels were out before the end. Paint removed, we hauled it in to the enamelers and left it, waiting for the call that would let us know they'd found time for it. The call finally came and we picked it up (including the four odd legs - nothing like a bit of eccentricity!), lugged it home and polished it with the special cloths that were provided. This took off the last tiny nibs.

Finally we heaved into place, connected the plumbing and stood back to admire our new bath.

To be quite honest, our bath isn't the same as your average several-thousand-dollar new cast-iron bath. The enamel is thinner than the original enamel, as our enamel is a two-part paint product. This has meant, in practical terms, that it is much easier to chip or scrape the finish on our bath. Two years later and our bath now bears small scars from clumsily handled metal plugs and various other accidents, but it is certainly in full working order.

Cover and Colour

Posted: Wednesday, October 28, 2009
Back to the bathroom.

 The bathroom wall laid bare, exposing the plumbing pipes.

It is now August 22nd. Due to budget restrictions, it has taken a while to actually install the plumbing and electricity. But now it is all just about done. We (unfortunately) had to take the gyprock off that wall in order to run the pipes for the sink and shower. I say 'unfortunately' because it meant more plastering later on.

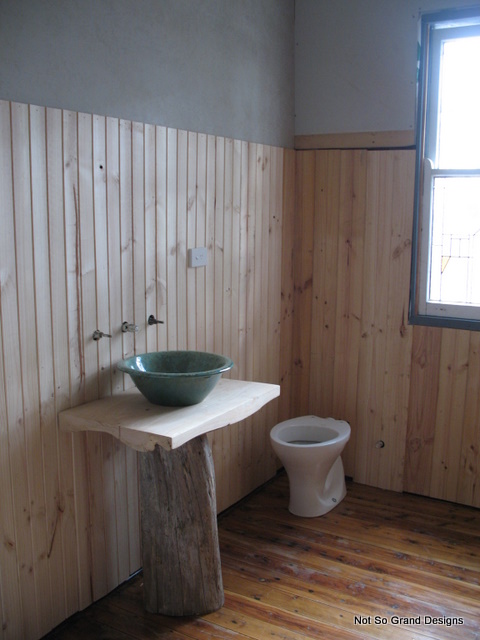
 The new panelling, sink and toilet.

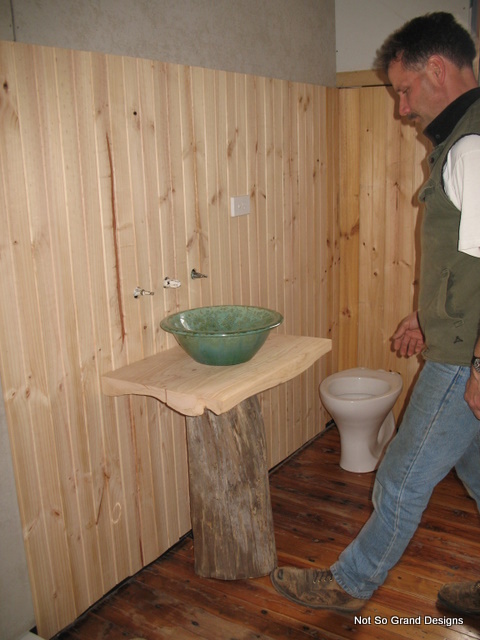
This photo was taken on September 3rd. The new panelling is on, the toilet in and the sink installed. The sink bowl was taken in part payment for a job Dad did locally and is from a very limited supply. Only one man produces them, and the glaze is their most intriguing (and apparently difficult) aspect. The sink stand was built by Slick. In the above photo it is still undergoing final adjustments. Its surfaces have not yet been finished.

And the same again.

We based the bathroom colours on those to be found in the sink bowl glaze.

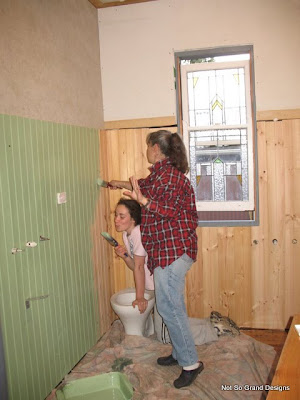
  Llick and Blick painting the panelling green - the same colour as the sink.

By September 8th, colour was being applied. The sink was removed for safety, meanwhile.

 The view of the bathroom from the room outside at the end of September.

Perhaps it was because progress was so drawn out that we have very few and scattered photos of this part of the renovation. Even though the successful completion of this new bathroom would act as a removed chock, allowing all the rest of the renovation to go forward, and even though we knew this only too well (every other move we thought of making was blocked by the placement and necessary existence of the old bathroom), we could only go forward as fast as our resources allowed. By the time the above photo had been taken (September 29th), we had paid for the plumbing and electricity work, and bought a new toilet (you will soon see why that was necessary), new lights and a shower screen. All our outlay was over, and only our own time and effort lay between us and a completed bathroom. Finally our urgency for change could be translated into action!

Fence Update

Posted:
This is a quick update on what the front boundary of Lizard Rock looked like in the middle of July, 2007.

 The newest stretch of our front fence, including the carved lizard and house number on the stone wall and Slick's business sign on one panel. Freshly turned and manured garden beds lie along the top of the stone wall, at the base of the fenceline, waiting to be planted.

That's the neighbour's house in the distance and no, that is not our vehicle!

Taking Shape

Posted: Wednesday, October 21, 2009
June 16th found Slick framing up the wall that would close the room off from the living area. Some thought and discussion had to go into this step before he could proceed, as the original builder had (for whatever reason) interrupted the ceiling surface with a low beam. You can see it in the picture below. It runs along behind the top timber of the wall frame.

Installing the semi-constructed wall frame that will separate the bathroom from the living areas.
This beam didn't run in line with the wall of the room to the left. (Of course not, that would be too straightforward and logical.) Instead, it was set back a little more than the width of the wall. This meant that even though we set the wall frame on the outside of the beam (so the beam protruded into the bathroom) the new wall still wasn't quite flush with the old. This caused plastering challenges later on.

  Wedging it in... A few well-aimed kicks helped.
Inside the bathroom, after deciding on framing up the wall outside the beam, we were left with the problem of resolving the beam visually. It looked really odd, one wall jutting out at the top. We ended up figuring 'if you can't beat 'em, join 'em' and built look-alike boxes along the top of the other three walls. This transformed a problem into a stylistic distinction and advantage, saving us from the cornice issue and giving the bathroom an individual look and feel. However, it was painful to accomplish, as anyone versed in the art of plastering could inform you. The next picture will give you a glimpse of what it looked like in progress:

 The box cornice in plastering phase, later in the reno.
You can see that the box cornice surfaces consisted largely of plaster by the time we'd done two concave corners and one converse, with very little between. Blick learned to plaster on this room and she did a good job. (Those lights were the kitchen lights. We were a little short on light in the kitchen for a while!)

  Blick hammering the base of the frame down.
As you can see in most of the above photos, the bottom timber of the wall goes right from wall to wall. Eventually the door into the bathroom was to hang on the right-hand side, so after the wall had been built and secured Dad must have cut out the section of the base plate in the door area.

You may wonder about the pine two-by-fours. They are new, bought cheaply from the discard pile at our local building supply store. The timbers were too full of big knots and other weaknesses to be sold to construction builders who would use them in load or stress bearing situations. The timber was fine for our purposes as we were able to cut out the imperfections and use the timber in relatively low-stress applications. The walls, for instance, basically held up the gyprock, pine panelling and insulation. No major load bearing or lateral strain was being taken. Thus they were ideal for us.

Bathroom Beginnings

Posted: Tuesday, October 20, 2009
It is June 15th. Our kitchen has suddenly shrunk. As readers of previous posts have already seen, first a door has been removed, then a window installed. The wall separating the kitchen and dining area has also been removed, unfortunately without a photographic record. Now a completely new wall is being built, cutting the kitchen almost in half.


First, the kitchen was half cleaned out, then the wall framed in. Shelves had to be made and furniture, such as the pantry cabinet, fitted back into the remaining kitchen so the cook didn't go quite crazy. Then the panelling was nailed on. This tongue and groove pine panelling was actually bought new. Gyprock recycled from other walls in the house and gyprock bought for a song off the 'damaged pile' then clad the upper walls.


That night, Dad got out the (new) tin of Tongue Oil/Polyurethane mix and put down the first layer of floor sealant.

Oh, I nearly forgot. Speaking of the floor and sealing it, obviously the floor had first to be sanded back. The floorboards, fresh and new when we took up the linoleum fifteen months before, were by now darkened with a layer of ingrained dirt. In shifts, we painstakingly sanded off that fifteen month layer of our life story with a palm sander. Dad's belt sander died ages ago, so, going through many sandpaper pads, we worked the floor with a little, zippy hand sander. It was slow and numbing. After finishing a shift, your hand/s would feel fat and clumsy - as though you had pins-and-needles - and itchy, as well! But it was soon done, being only a small space, and resulted in a floor that looked and smelled almost brand-new.

Then the sealant poured on and transformed the pale honey pine into rich, warm tones that deepened even to black over the knots in the timber. Shame about the smell!