Cover and Colour

Posted: Wednesday, October 28, 2009
Back to the bathroom.

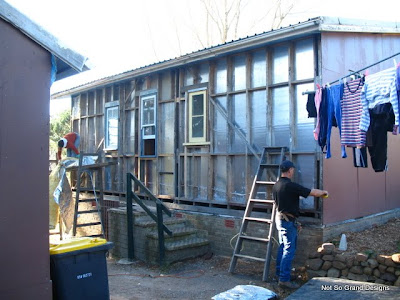
 The bathroom wall laid bare, exposing the plumbing pipes.

It is now August 22nd. Due to budget restrictions, it has taken a while to actually install the plumbing and electricity. But now it is all just about done. We (unfortunately) had to take the gyprock off that wall in order to run the pipes for the sink and shower. I say 'unfortunately' because it meant more plastering later on.

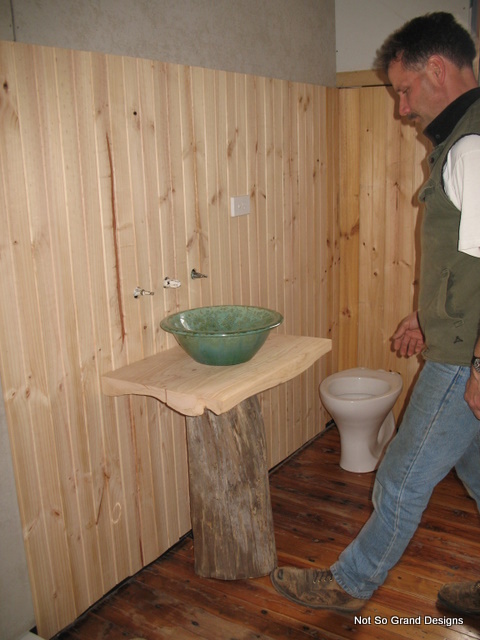
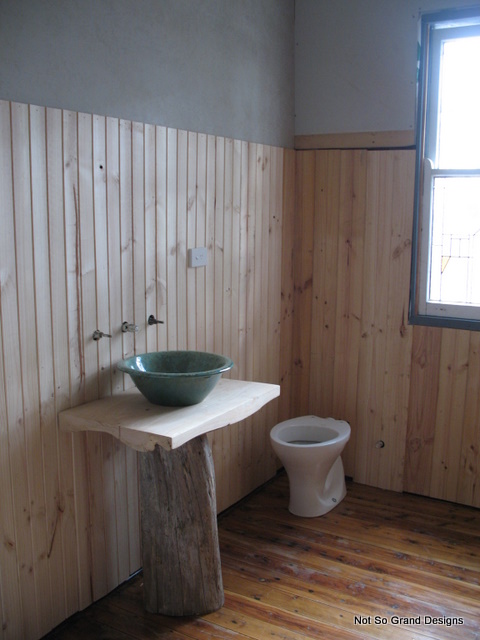
 The new panelling, sink and toilet.

This photo was taken on September 3rd. The new panelling is on, the toilet in and the sink installed. The sink bowl was taken in part payment for a job Dad did locally and is from a very limited supply. Only one man produces them, and the glaze is their most intriguing (and apparently difficult) aspect. The sink stand was built by Slick. In the above photo it is still undergoing final adjustments. Its surfaces have not yet been finished.
And the same again.

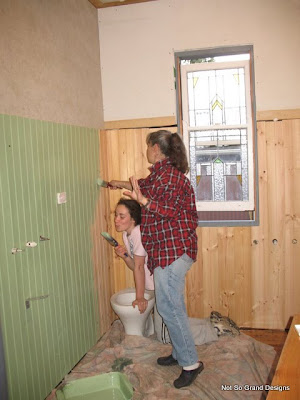
We based the bathroom colours on those to be found in the sink bowl glaze.

  Llick and Blick painting the panelling green - the same colour as the sink.

By September 8th, colour was being applied. The sink was removed for safety, meanwhile.

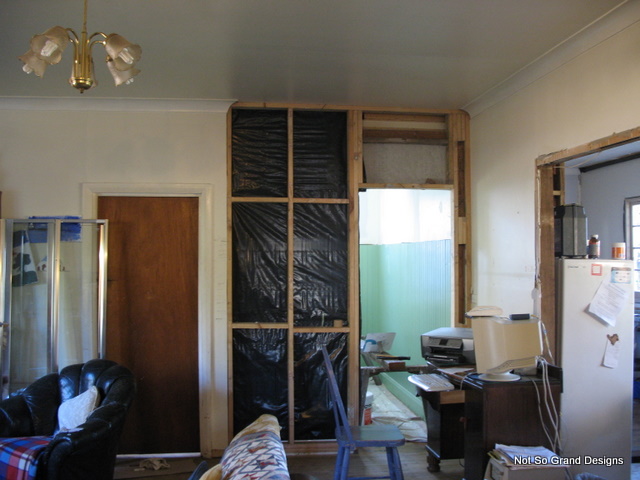
 The view of the bathroom from the room outside at the end of September.

Perhaps it was because progress was so drawn out that we have very few and scattered photos of this part of the renovation. Even though the successful completion of this new bathroom would act as a removed chock, allowing all the rest of the renovation to go forward, and even though we knew this only too well (every other move we thought of making was blocked by the placement and necessary existence of the old bathroom), we could only go forward as fast as our resources allowed. By the time the above photo had been taken (September 29th), we had paid for the plumbing and electricity work, and bought a new toilet (you will soon see why that was necessary), new lights and a shower screen. All our outlay was over, and only our own time and effort lay between us and a completed bathroom. Finally our urgency for change could be translated into action!

Fence Update

Posted:
This is a quick update on what the front boundary of Lizard Rock looked like in the middle of July, 2007.

 The newest stretch of our front fence, including the carved lizard and house number on the stone wall and Slick's business sign on one panel. Freshly turned and manured garden beds lie along the top of the stone wall, at the base of the fenceline, waiting to be planted.

That's the neighbour's house in the distance and no, that is not our vehicle!
Taking Shape

Posted: Wednesday, October 21, 2009
June 16th found Slick framing up the wall that would close the room off from the living area. Some thought and discussion had to go into this step before he could proceed, as the original builder had (for whatever reason) interrupted the ceiling surface with a low beam. You can see it in the picture below. It runs along behind the top timber of the wall frame.

Installing the semi-constructed wall frame that will separate the bathroom from the living areas.
This beam didn't run in line with the wall of the room to the left. (Of course not, that would be too straightforward and logical.) Instead, it was set back a little more than the width of the wall. This meant that even though we set the wall frame on the outside of the beam (so the beam protruded into the bathroom) the new wall still wasn't quite flush with the old. This caused plastering challenges later on.

  Wedging it in... A few well-aimed kicks helped.
Inside the bathroom, after deciding on framing up the wall outside the beam, we were left with the problem of resolving the beam visually. It looked really odd, one wall jutting out at the top. We ended up figuring 'if you can't beat 'em, join 'em' and built look-alike boxes along the top of the other three walls. This transformed a problem into a stylistic distinction and advantage, saving us from the cornice issue and giving the bathroom an individual look and feel. However, it was painful to accomplish, as anyone versed in the art of plastering could inform you. The next picture will give you a glimpse of what it looked like in progress:

 The box cornice in plastering phase, later in the reno.
You can see that the box cornice surfaces consisted largely of plaster by the time we'd done two concave corners and one converse, with very little between. Blick learned to plaster on this room and she did a good job. (Those lights were the kitchen lights. We were a little short on light in the kitchen for a while!)

  Blick hammering the base of the frame down.
As you can see in most of the above photos, the bottom timber of the wall goes right from wall to wall. Eventually the door into the bathroom was to hang on the right-hand side, so after the wall had been built and secured Dad must have cut out the section of the base plate in the door area.

You may wonder about the pine two-by-fours. They are new, bought cheaply from the discard pile at our local building supply store. The timbers were too full of big knots and other weaknesses to be sold to construction builders who would use them in load or stress bearing situations. The timber was fine for our purposes as we were able to cut out the imperfections and use the timber in relatively low-stress applications. The walls, for instance, basically held up the gyprock, pine panelling and insulation. No major load bearing or lateral strain was being taken. Thus they were ideal for us.

Bathroom Beginnings

Posted: Tuesday, October 20, 2009
It is June 15th. Our kitchen has suddenly shrunk. As readers of previous posts have already seen, first a door has been removed, then a window installed. The wall separating the kitchen and dining area has also been removed, unfortunately without a photographic record. Now a completely new wall is being built, cutting the kitchen almost in half.


First, the kitchen was half cleaned out, then the wall framed in. Shelves had to be made and furniture, such as the pantry cabinet, fitted back into the remaining kitchen so the cook didn't go quite crazy. Then the panelling was nailed on. This tongue and groove pine panelling was actually bought new. Gyprock recycled from other walls in the house and gyprock bought for a song off the 'damaged pile' then clad the upper walls.


That night, Dad got out the (new) tin of Tongue Oil/Polyurethane mix and put down the first layer of floor sealant.

Oh, I nearly forgot. Speaking of the floor and sealing it, obviously the floor had first to be sanded back. The floorboards, fresh and new when we took up the linoleum fifteen months before, were by now darkened with a layer of ingrained dirt. In shifts, we painstakingly sanded off that fifteen month layer of our life story with a palm sander. Dad's belt sander died ages ago, so, going through many sandpaper pads, we worked the floor with a little, zippy hand sander. It was slow and numbing. After finishing a shift, your hand/s would feel fat and clumsy - as though you had pins-and-needles - and itchy, as well! But it was soon done, being only a small space, and resulted in a floor that looked and smelled almost brand-new.

Then the sealant poured on and transformed the pale honey pine into rich, warm tones that deepened even to black over the knots in the timber. Shame about the smell!

Insulating the Western Wall

Posted: Wednesday, October 14, 2009
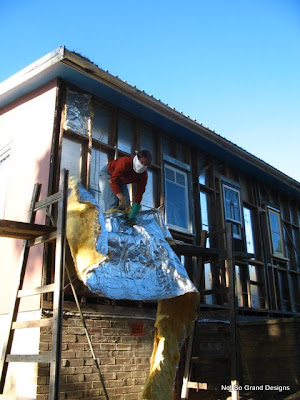
Winter was nearly upon us, but we were determined not to be caught again with an unclad wall. Last winter had been cold enough. Thanks to the assistance of an old friend, we were able to purchase the materials necessary to buy the (recycled) cladding. But before it could be put up, the rest of the insulation we'd salvaged from the tip so many months ago was finally to be used up. It had been sitting in a shrinking pile under an old blue plastic pool liner for the past twelve months, occasionally scattered by the wind or leaked on through stray holes. What a relief to go through it for the last time.

 Click beginning on the insulation.


 Slick measuring up.
The steps that used to lead up to the old kitchen door look rather pathetically pointless.

  Click up on the scaffolding with insulation and a 'bandit' mask.
I hate wearing masks, no matter how good they are for me. Either we didn't have access to a conventional mask, or I was determined to be a bit different since I had to wear one. I can't quite recall. Oh, but I didn't enjoy this. The fiberglass fibers are horrible - they make you itch all over. And then there was the added joy of the insulation being dirty and sometimes wet, depending on where in the stack it had been. As we couldn't put wet bits in the wall (damp was okay), we had to cut those sections out and adjust accordingly. Put it this way: there was a reason we got it for free. (Everyone else has more sense!)

  The joys of insulating.
 It was painful, but it was worthwhile. Our wall ended up insulated, for nothing more than our time and effort, and a waste product was stored in a useful, invisible way. Our struggles with recycled fiberglass insulation were over.

The Third (and last) Western Window

Posted: Monday, October 12, 2009
 The rectangle of gyprock disappearing out the new window.

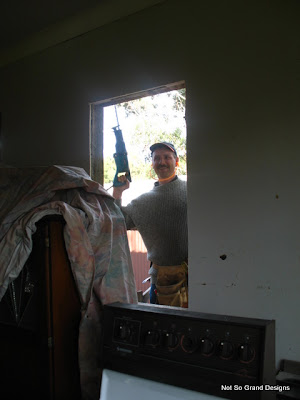
  Slick grins through the new window.
Photos: May 28th, 2007.

(Old) New Bathroom Window

Posted: Wednesday, October 7, 2009
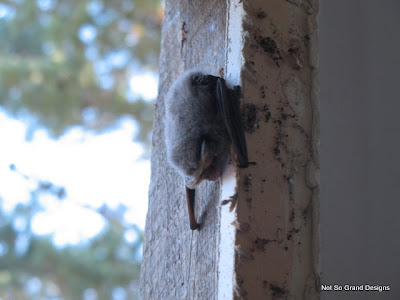
Guess what we found when we took out our kitchen door-frame, causing the hole in the wall to be seen below?


 Bat on the top corner of the door-frame.
A little bat! I guess it was dry and snug there.

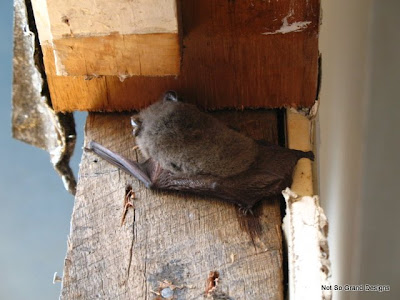
  Bat on the top corner of the door-frame.

  Bat on the top corner of the door-frame.

  Bat on the top corner of the door-frame.
He didn't move much at first - he was probably bleary-eyed after a hard night's hunting - but after a while our excitement roused him enough that he flitted off.

 
Did I ever mention how much harder it is to frame up windows with well-seasoned hardwood? But hey, that's sometimes what comes of recycling. You use what you can.

 
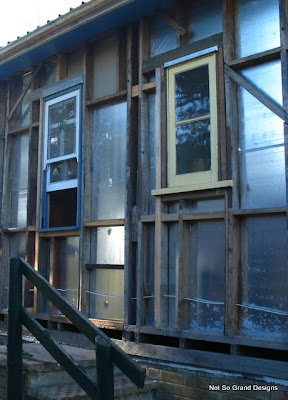
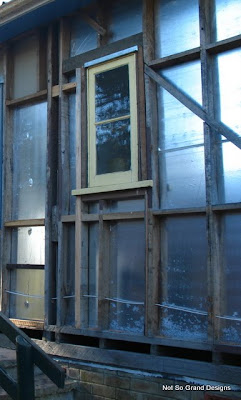
This is the new window, destined - eventually - to open into a new bathroom. It is so painful, expensive and time-consuming to put plans through our local council, that we made a lot of decisions in the renovation influenced by our wish to avoid having to go through that ordeal. After some inquiries, we discovered that - as long as we moved to a room with existing plumbing - we could move kitchen and bathroom without having to put a development application through council. The bathroom could not stay where it was, on the sunny side of the house with the view, but we could only move it to a room with existing plumbing. We decided to slice off the southern section of the current kitchen (which was not going to stay there) and bring in light through the western wall. The new bathroom is the only complete room in the house with natural light only coming from one side. (Though the incomplete en-suite is like that too, at the time I log this post.) Unfortunately, we could not avoid this problem of only one widow; fortunately, it hasn't been much of an issue, though.


  The finished window from outside.
There it is, the stained glass window Mum had been hanging out for! (And no doorway at the top of the stairs.)

Next up, the installation of the last window in the western wall.

First Window in the Western Wall

Posted: Tuesday, October 6, 2009
A couple weeks later we were back to installing windows. The first one was put into the little bedroom.

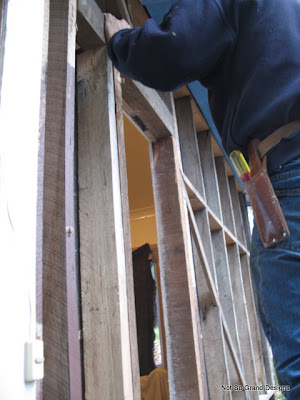
 The rectangle of cut gyprock seen from inside the house, with two disconnected hands grasping either side.

  The rectangle disappearing...

 Slick grins at the photographer, through the new window opening.


  From the outside, looking up and through newly framed window opening.

  The new window.
Of course, the window was recycled, as were the timbers used to frame it. Most of the timber, in fact, was already there; it just had to be rearranged somewhat.

This wall was the last one remaining uninsulated and unclad. As we were heading back into winter, the push was now on to change this situation as soon as possible - as coming posts will show.

The Laundry

Posted: Monday, October 5, 2009
Sorry folks, somehow we missed out on photos of the painting of the laundry. You'll just have to believe me when I tell you that the laundry was originally white...ish and had all the plumbing coming in on the wall where the big double-sash window is now. Thanks to the services of Phil the Plumber, all our water now comes in through the western wall, where you see all the taps. Thanks to Keith and Jon the Electricians, our fresh green walls also sported new powerpoints, and thanks to Llick and Click everything was freshly painted. Thanks to Slick, the room finally had the natural light it had been starved of. For when we first bought the property, there had only been a very small window to let light into the bare, dark room that did for a laundry. And very soon after our arrival even that little window had been removed - along with the asbestos cladding - and closed up for security reasons. It was glorious to see that sunlight streaming through the windows into a fresh, clean room.

 Looking from the external door toward the diagonally opposite corner.
Our next step was to tile the floor, and May 15th, 2007, was the day we did it.

  From the external door, looking to the direct opposite corner.

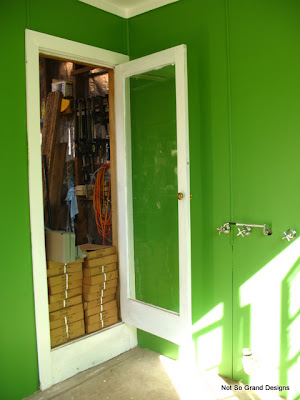
  The door in the south west corner - the same corner as the photo above.
This door leads into the back of the garage/shed/workshop (we call it all these things).Those stacked boxes contain the slate tiles we were about to lay.

  The external door with a window to its left.
 The external door, which is almost directly opposite the current kitchen door.

  Click laying a row of slate squares parallel to the string-line.
To begin the tiling process, we measured the walls and strung string-lines from the centres of each. This gave us reference points with which we could start the tiles off square and straight.

  Slick and Click working at tiling along both string-lines, forming a cross that quarters the room, watched by Glick, Alick and Klick.
They are actually slates, not tiles, bought at a bargain price because they were the last of the supply. We had just enough to do the laundry, plus a box or two left over.

Because I have no more photos, I communicate the rest of the process by text. By completing the  room systematically, working from the quarter of the room furthest from the door, we managed not to trap ourselves into a corner! We had tiled too many times before to make that mistake, and finished the tiling by the end of the afternoon.

The next day we grouted with dark grey grout, and it did look good. Once the grout was dry, we washed the floor a few times to remove the remaining surface grit and oxide. Clean and well dried, the floor then received a coat of smelly, but effective, slate sealant, which brought out all the subtle colours in the stone as well as seal it from the water that it would later have to endure.

From raw concrete, splotched with old white paint, industrial and ugly, to an attractive, dark floor that set off the bright walls and brighter ceiling - the effect had to be seen to be fully appreciated. This room was no longer a rough afterthought or a dark little utility hole in which clothes were supposed to become clean, it was now a sunny room with a character and feel all of it's own; a place that felt clean and businesslike, without jarring the senses. The laundry was transformed, and now all that it needed was its furniture.

Our washing machine was brought back in, a set of sorting shelves built for the dirty laundry and a deep sink installed next to the washing machine. We were in business!

Crisp Autumn Morning View

Posted:
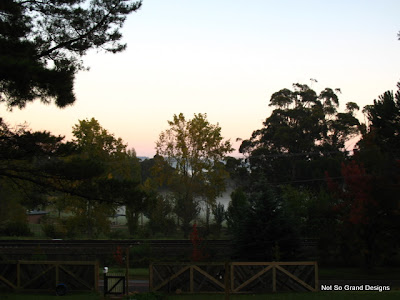
This is our view on clear, cold autumn mornings.

 The view from our front windows across the town sports oval and park on a crisp autumn morning - trees turning crimson and mist rising into the clear cold air.

As you can see, the fence hasn't progressed at all over the past week or so since Easter.

By the way, if anyone actually reads this blog, please, please comment. If I don't get some feedback soon, posts on this blog might very well dwindle. Not to threaten or anything! And, in case someone does read this blog, let me take this opportunity to say 'Thanks!' Let me know what things you really like to hear about or see and I will try to incorporate those things more.

Click.

First Renovation Anniversary

Posted: Thursday, October 1, 2009
On April 11th, we celebrated one year's ownership and development of 'Lizard Rock'.

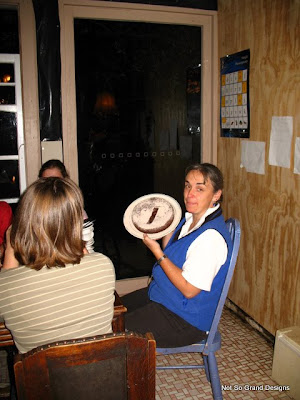
 Llick holding up the anniversary cake
Llick holds up the cake (probably made by someone other than Mum, judging by the lack of height). We are dining in the area that used to be veranda till we installed the windows, clad the outer and took out the inner sliding doors. The bathroom is still on the other side of the plywood behind Mum. Do you see the stains at the bottom of that wall? Water from the shower on the other side sometimes leaked through and drained away under the window.

 The clad laundry wall.
And on the same day this photo was taken of the shed/laundry wall, opposite the kitchen. As you can see, not only is it clad, but at some time during the last three or four months Slick has installed a new door and two new windows. But more on this project later.

The renovation had been hard - emotionally, physically and mentally - but it was wonderful to contemplate what we had managed to accomplish, by the grace of God, on an almost non-existent budget. The application of much hard labour, time, initiative and innovation, combined with some skill, to materials from the local dump, various jobs, friends and a unexpected places, gave us results that many people pay much money for. It would have been much easier to take out a loan, but we were determined to use our skills and the materials available and to come out the other side beholden to no-one. We saw this house as our God-given opportunity to work our way further out of morgage debt. Once finished, we planned to sell it and move straight on. As it turns out, two years later, we have not yet arrived at the right time to sell. The house has been on the market, and then been taken off. But I am jumping far ahead of myself. Look out for the upcoming laundry post!

Easter Display - Scene II

Posted:
The scene outside our front fence, Easter Sunday, 7th April, 2007.


Easter Display - Scene I

Posted:
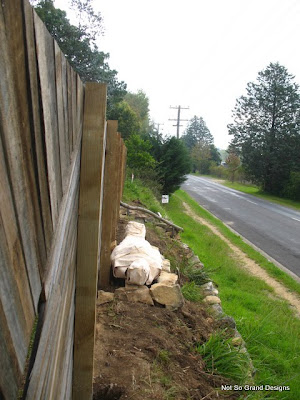
 The white-wrapped 'corpse' lying along the base of the front fence, above the rock wall.

 'Corpse' from a different angle.


 Wide angle shot of entire scene, showing the angel peering over the fence with wings outstretched to shelter the body below.

 Close up from left angle.

  Close up from right angle.
Photos taken Friday 5th April, 2007.